Set up your claims workflow
Who reviews a claim, what happens when a unit has to come back, and what your customers hear along the way. About seven minutes.
Your portal can now take claims. This step covers what happens to them.
Plan an hour, with whoever currently handles claims.
Every claim moves through the same states:
Submitted → In review → Approved or Rejected
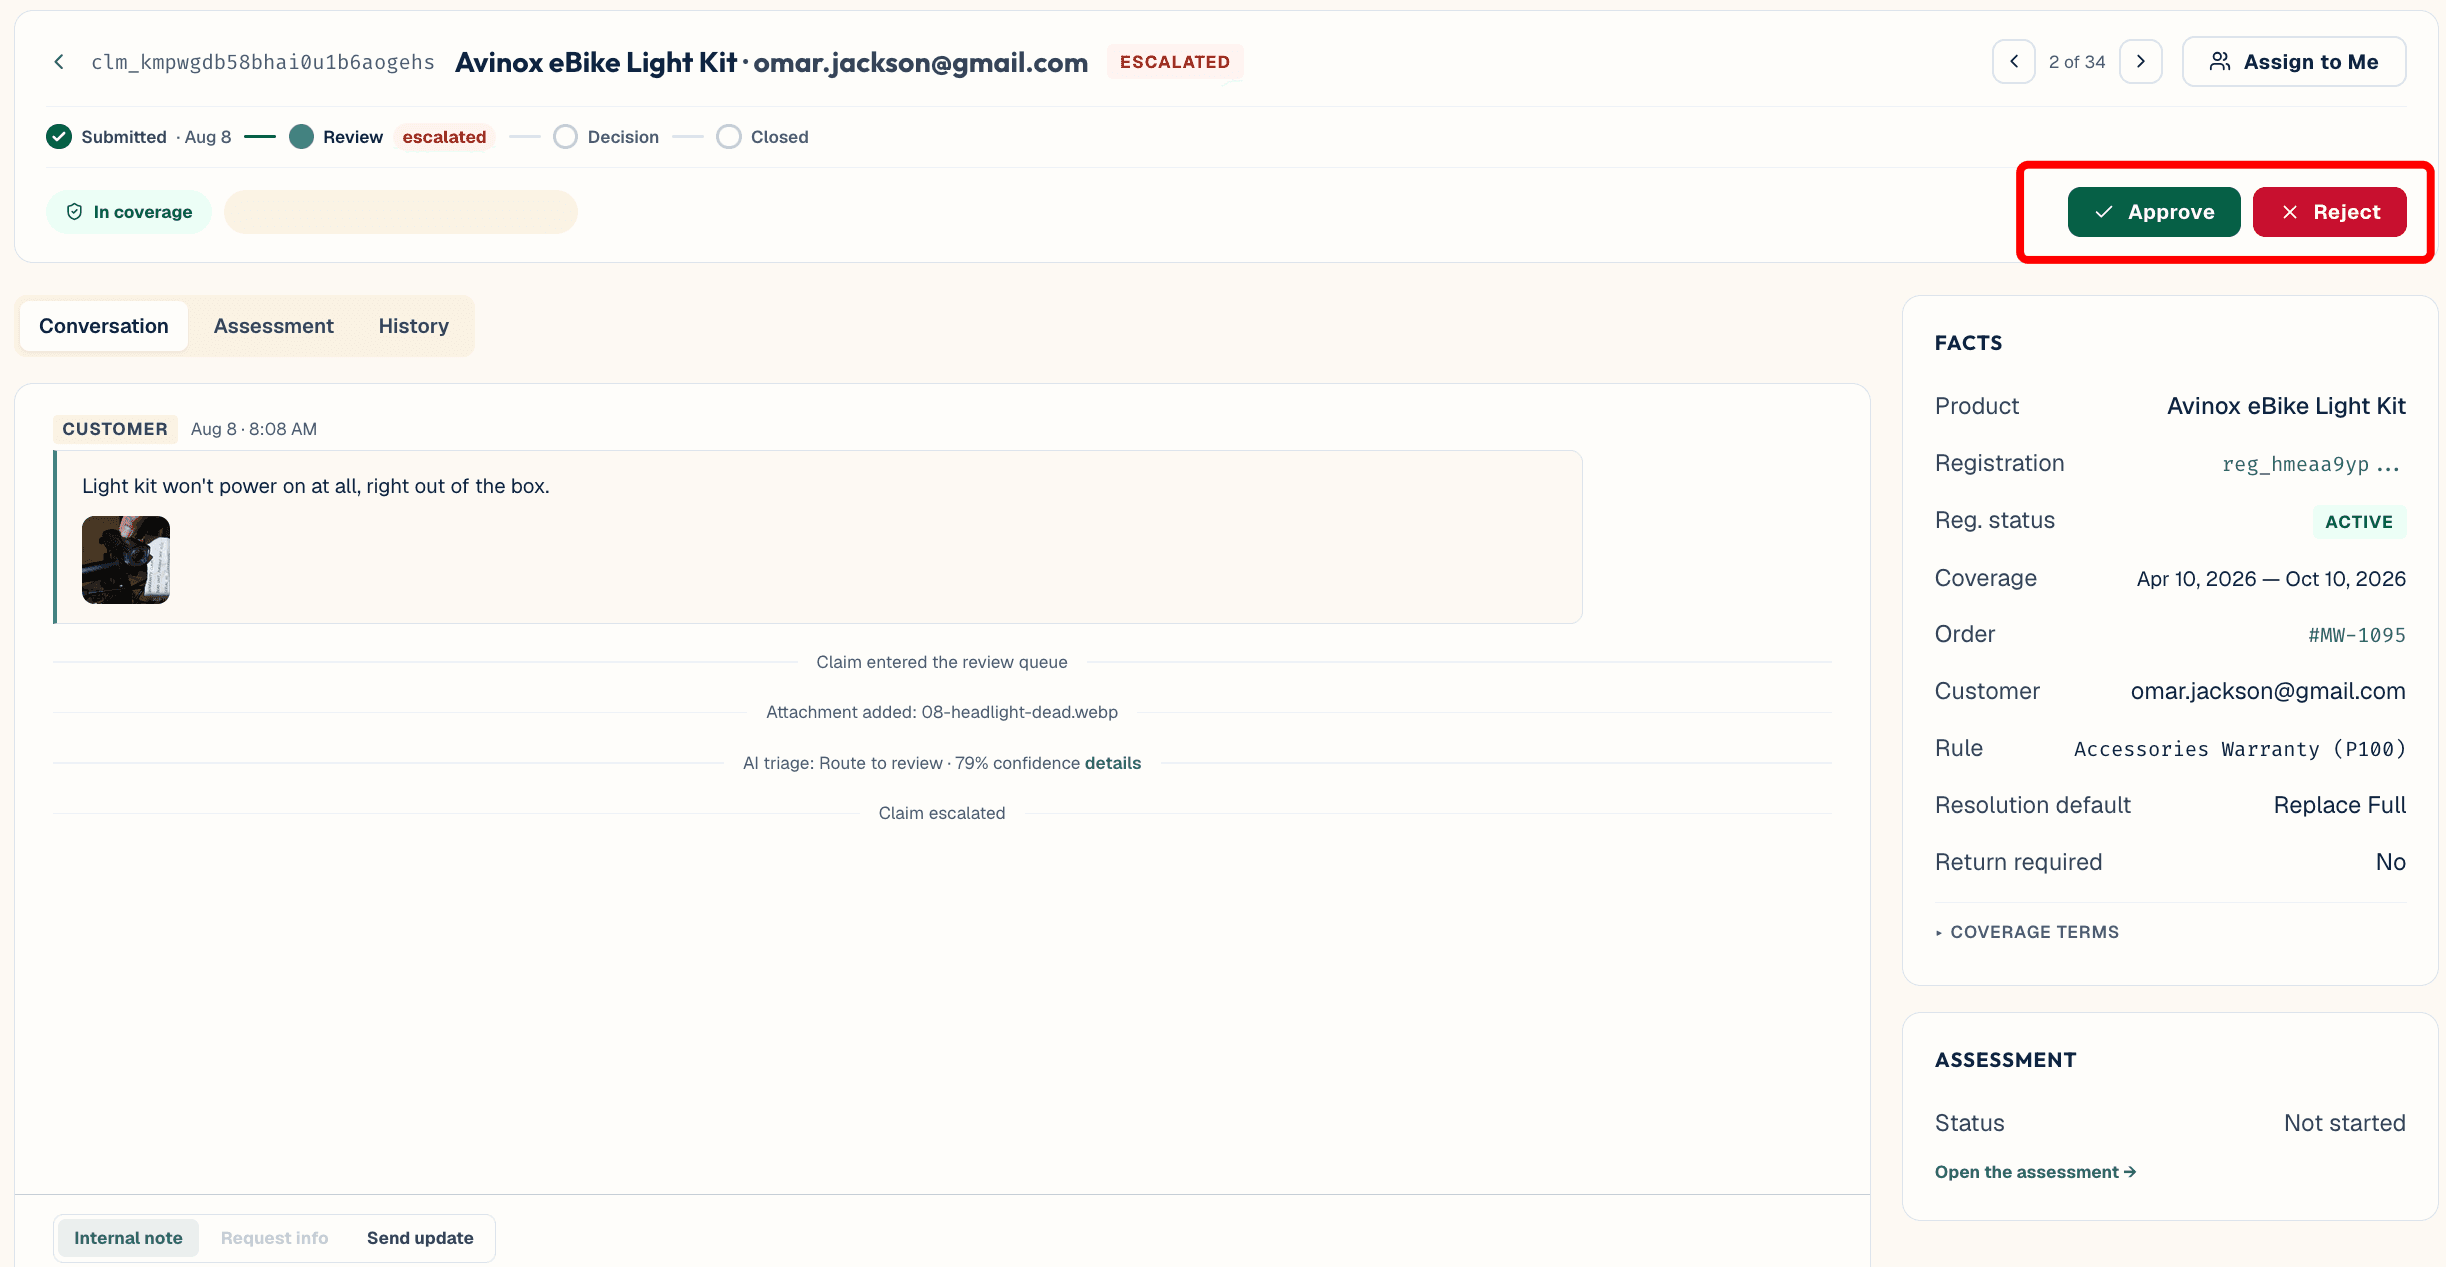
Two side states can happen along the way:
- Information requested — you've asked the customer for something and are waiting. Their reply comes back into the claim itself.
- Escalated — the claim needs a more senior review.
This step configures who does the reviewing, what happens when a unit needs to physically come back, and how escalation and defect categories work.
A claim arrives with the customer's coverage already confirmed, the order it relates to, the photos they attached, and a first read on the defect.
That first read is generated automatically: the claim is sorted by complexity and likely validity, the defect is categorised with a confidence score, and a resolution is suggested — repair, replace, or refund — with the reasoning shown.
Each of these is a suggestion your team can accept, change, or ignore, unless auto-approval has been explicitly turned on and a claim clears the confidence threshold you've set — that's an opt-in, off by default. Every decision recorded against a claim has an actor attached, human or AI.
For a team used to starting from nothing on every claim, straightforward claims take a minute instead of ten, and the ones needing real judgement are the ones flagged for it.
Claims are worked day-to-day from the claims list, a queue-strip view over the queues set up below.
The list supports filtering by status, inspection status, assignee, and date range, plus search. Keyboard shortcuts are available for moving through claims quickly during triage.
This is distinct from the claim-detail screen described above — the list is where a team works through volume; the detail screen is where one claim gets reviewed.
warrantini calls claim-triage buckets queues. Team member roles live under Team in the sidebar, the same place you invited people during account setup.
Most brands sort claims into a handful of queues: one where claims land first for assessment, one for approvals that need a more senior look, one for units that need to be received back at a warehouse, and one for quality review of defect patterns. A team of two doesn't need all of them running — one queue that works claims and one that approves the expensive ones is fine. More can be added later.
There's no approval-limit system today — no monetary threshold, no per-role limit, no per-resolution-type gate. Any team member, agent, admin, or owner, can approve any claim resolution.
Approval discipline is a team-process choice rather than something warrantini enforces. For a second pair of eyes on expensive decisions, agree on it as a team norm — for example, routing anything above an agreed value to a specific queue for a second look before approval.
Escalation has three layers.
The first is time-based: a claim sitting 48 or more hours in submitted or 7 or more days in in review becomes eligible for escalation.
The second layer is an AI evaluation toggle, on by default: Settings → Intelligence tab. On, the AI looks at the claim in context — value, customer history, how unusual the defect is — and can escalate it immediately if warranted, rather than waiting on age alone; if it decides not to yet, the claim keeps waiting, up to the hard limit below. Off, an eligible claim escalates immediately and automatically, with no AI judgment involved.
A hard, non-configurable time limit — roughly 4 days in submitted or 14 days in review — always escalates a claim once reached, if the AI has been deferring it. With the toggle off this rarely applies, since claims escalate well before this limit anyway. It exists so a claim can never sit forgotten indefinitely.
Decide who receives escalations. On a small team, that's one named person. Don't leave it as a queue nobody owns.
For each resolution, decide whether the product needs to be returned before you act.
Returns cost shipping and warehouse time. Skipping them costs the ability to know what actually failed. Most brands land in between: low-value items are resolved without a return, higher-value items come back.
When a return is required, the claim waits until receipt is recorded.
Returned units are received at the Returns & Inspection desk, a dedicated screen reachable by any admin today — there's no separate warehouse role yet. Scan or search by serial number or order to find the claim, then record the unit's condition on arrival.
That condition record becomes part of the claim's history.
Then the defect gets assessed: what failed, where on the product, how the customer was using it, how severe. Your team confirms or corrects what warrantini suggested from the photos.
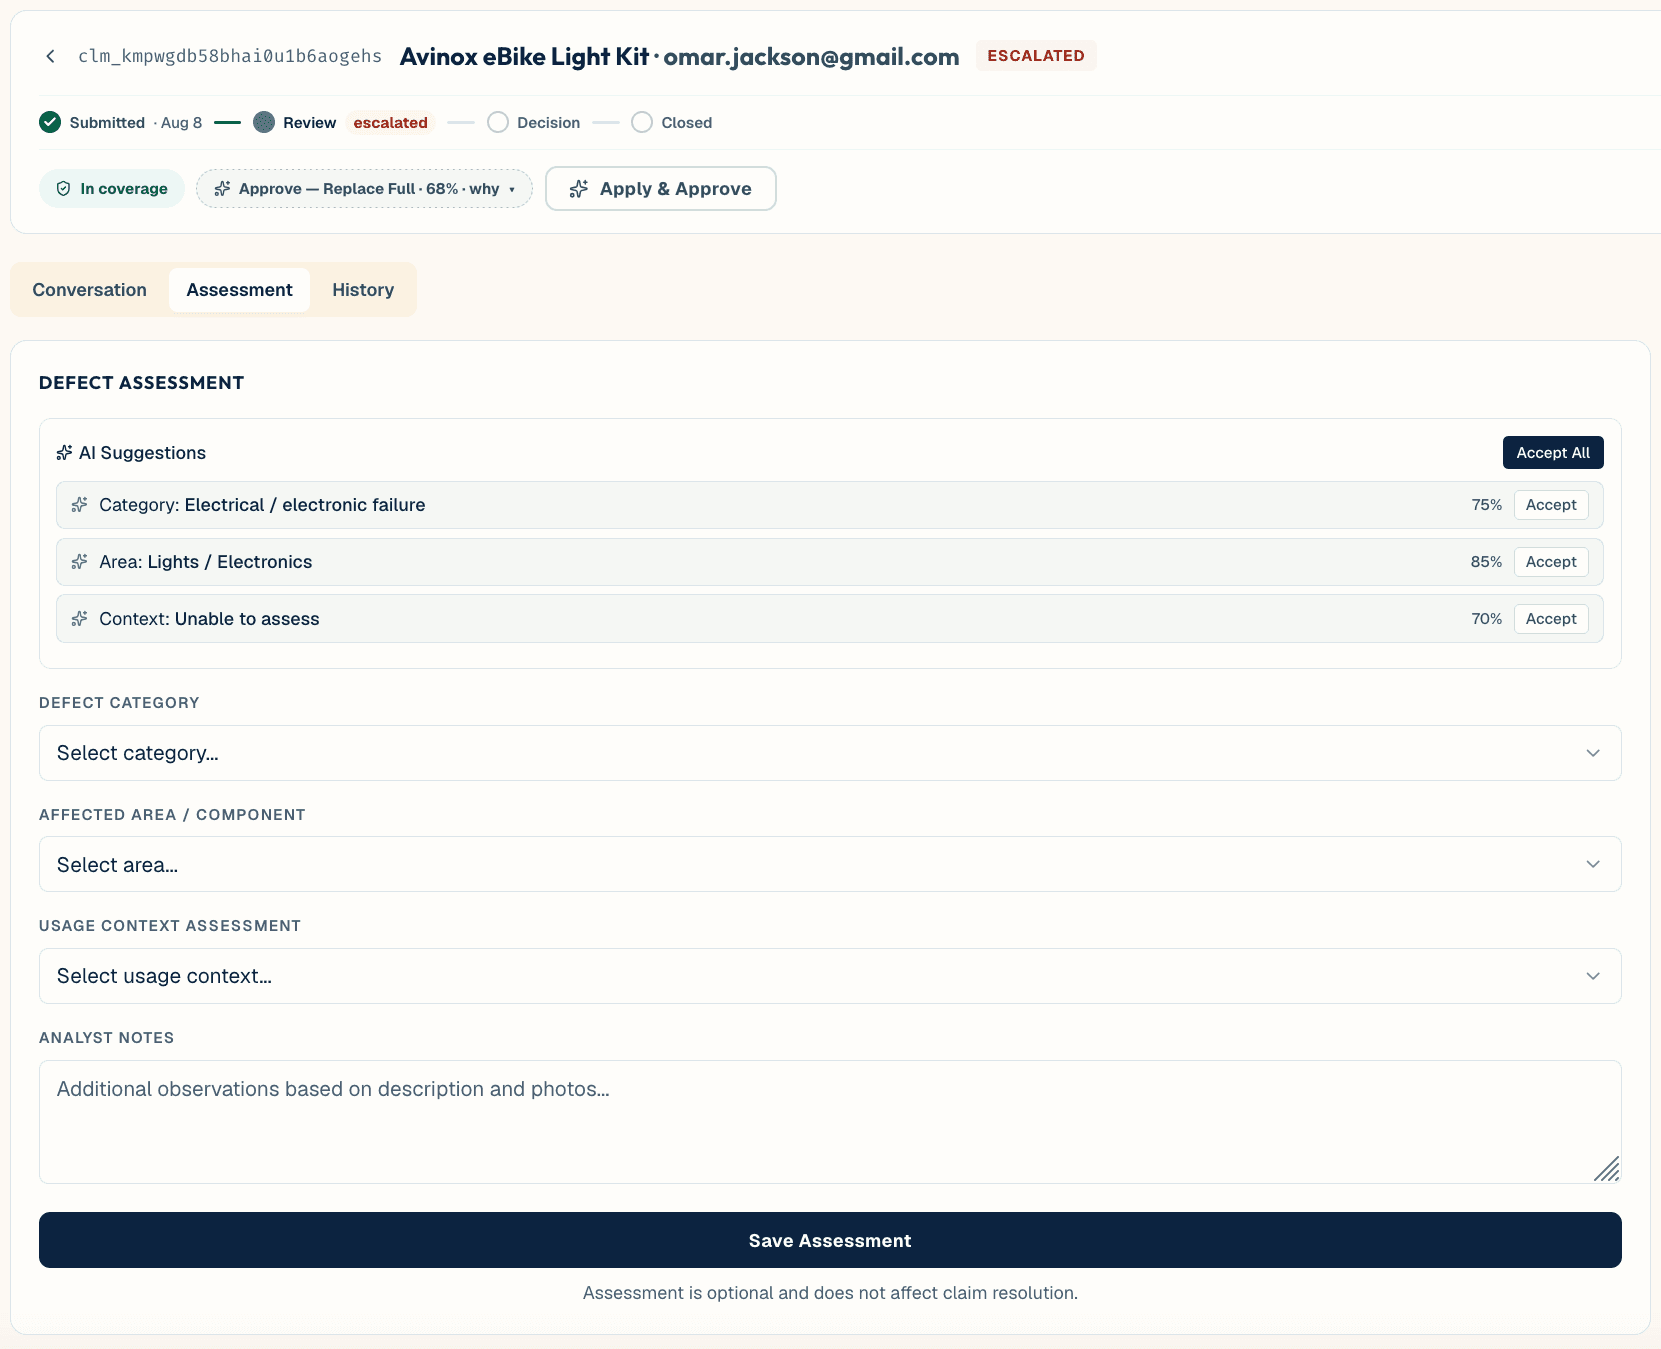
This assessment is the most valuable data your warranty operation produces. Fill it in properly even on a claim already decided — six months of assessments is how a pattern like one supplier's zips failing at four times the rate of another's gets found.
Your defect list should use your own words. Settings → Intelligence tab → Defect Intelligence.
You can edit your own option lists for defect categories, affected areas or components, usage context, and root cause, plus the dispositions recorded for a returned item. Severity levels are fixed and can't be renamed.
Start from the default list and rename categories, areas, contexts, and causes to match how your team already talks. Ten to twenty categories is plenty — too many and nobody picks consistently, which makes the data useless.
Categories can be added later, but renaming is better done before claims accumulate under the old names. Severity levels can't be renamed at all, at any point.
The Intelligence dashboard is a separate, tenant-wide screen — Settings → Intelligence covers configuration; this is where decisions themselves are reviewed — with three views:
- Overview — a summary of AI activity across the tenant.
- Decision log — every AI decision made, of any type: triage, assessment, resolution recommendation, escalation, rule recommendation, pattern detection.
- Patterns — defect clusters and unusual spikes.
Rule recommendations can be accepted or rejected directly from this dashboard.
As a claim moves through these queues, warrantini automatically sends your customers a small set of emails: order and registration confirmation, claim submitted, claim status changed, claim escalated, a claim update, return shipping instructions, return received confirmation, and — for coverage itself — a registration-expiring reminder and a registration-expired notice.
The wording of each of these is editable: Settings → Emails tab lets you edit the body text of each customer-facing notification, with a reset-to-default option.
Review each one before going live. The decision emails are worth particular attention — a rejection is the hardest thing your warranty operation writes.
Anyone on your team can leave a note on a claim. Notes are never shown to the customer.
Tell your team this explicitly on day one: notes are yours, messages are theirs.
For help thinking through queues and escalation paths, book a setup call.
Next: Do a test run