Brand and publish your portal
Your customers' front door: look up an order, register a product, file a claim. It's hosted for you and it looks like you. About six minutes.
Your warranty portal is the one part of warrantini your customers see. It's hosted for you — nothing to build, nothing to deploy.
It already exists. This step covers making it look like you and deciding what it asks for.
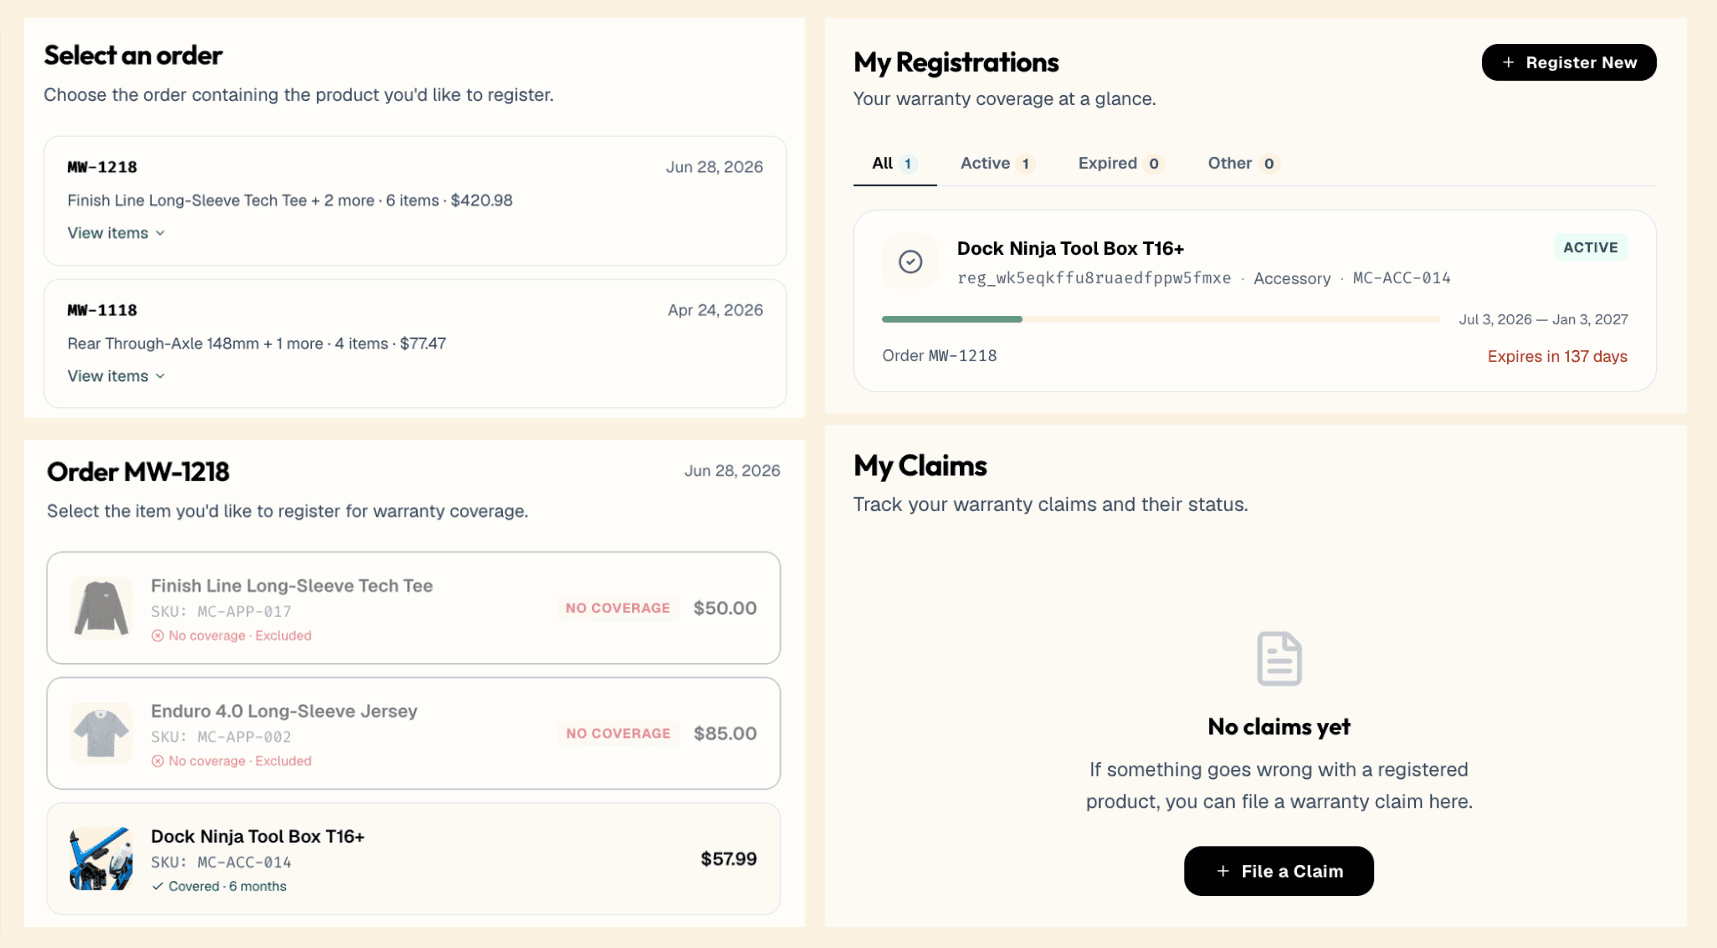
Four things, in this order:
- Look up their order with an order number and email address.
- Register a product — creates their coverage record and shows exactly what they've got.
- See what's covered, for how long, and read the policy that applies.
- File a claim, with photos, and check on it without emailing anyone.
That last point handles most of what would otherwise be inbox volume: customers asking whether they're covered, and customers asking what's happening with a claim they already filed. Both answer themselves here.
Settings → Portal tab → Portal Branding.
At minimum, add your logo and set your primary colour. Those two changes take about a minute and turn it from generic software into your warranty page.
Full set of branding controls: brand name, logo, primary colour, a corner-radius preset, a font preset, a header-accent toggle, support email, welcome headline, hero image, landing copy, welcome copy, contact phone, and contact email.
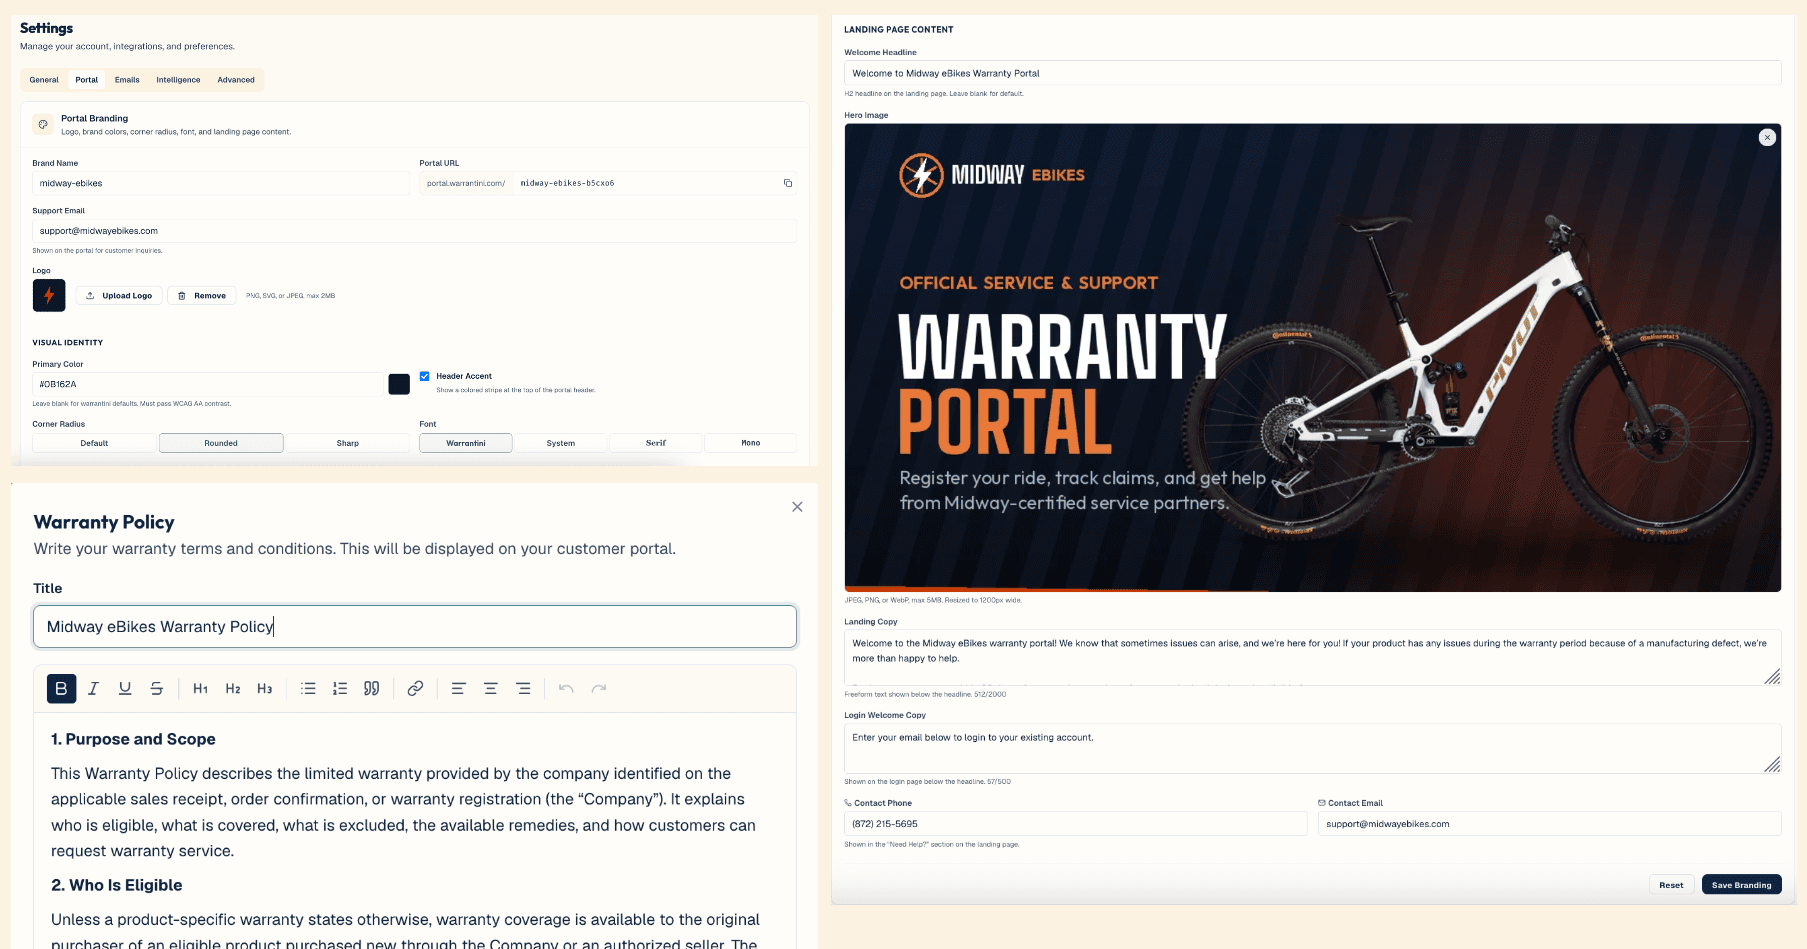
Custom domains — something like warranty.yourbrand.com — aren't supported today. Your portal URL is always portal.warrantini.com/{your-slug}.
There's no general way to mark fields required or optional on the registration or claim forms. The one control that exists is per product: whether a serial number is required for that specific product. It isn't configurable per rule or product type more broadly.
Serial number is usually worth requiring if your products carry one. The order already identifies the customer and what they bought, so most brands don't need to ask for anything else at registration.
On Growth and above, an admin can bulk-load serial numbers for a product from that product's Product Coverage detail page, instead of adding them one at a time.
On a claim, warrantini asks what's wrong, when the customer noticed, and for photos. Photos let you assess a defect without a phone call.
Start with fewer fields than needed. Adding a field later is easy; the registrations lost because a form looked like paperwork don't come back.
Some customers won't be found by an order lookup — they bought through a channel you don't have order data for, or bought before you connected a storefront.
Those customers can be allowed to register anyway by attesting to their purchase. Those registrations arrive as pending review rather than active, so a person on your team decides whether to accept them. Nothing is granted automatically.
This is a merchant-controlled setting: Settings → General tab → Self-Attested Registrations. Available on Growth and Scale, not Starter.
Turn it on if some customers buy through channels you don't have order data for. Leave it off if every genuine customer will be findable through order lookup.
Every registration — self-attested or not — can be browsed from Registrations in the sidebar, a top-level admin screen. Filter by All, Active, Pending Review, or Rejected, and search.
A registration awaiting review is approved or rejected from this list. Approving activates the registration; rejecting closes it out.
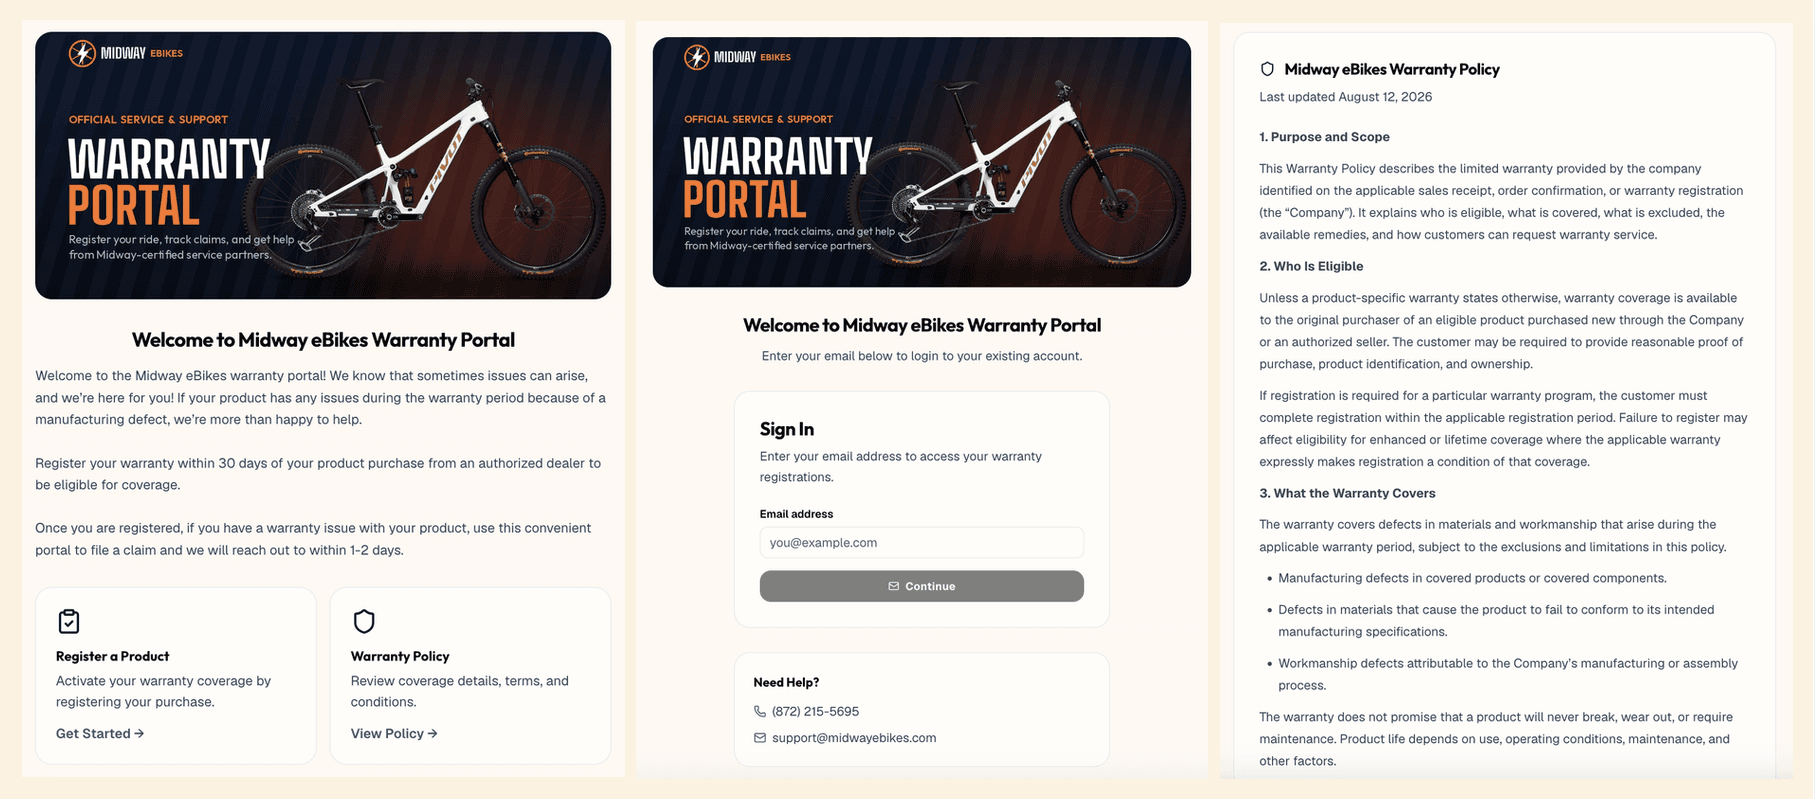
Your portal is live as soon as your rules are in place. There's no deploy step.
Copy your portal link from Settings → Portal.
Put it where your customers already are, in rough order of traffic each sends:
- Your order confirmation email. Highest-value placement — reaches every customer at the moment they're thinking about what they just bought. "Register your product" as a plain link.
- Your site footer, as "Warranty."
- In the box. A card with the link, or a QR code pointing at it.
- Your existing warranty page, replacing whatever PDF or form is there now.
- Your support macros, so your team can send it in one click instead of explaining the process.
Don't do all five on day one. Do the order confirmation email and footer, watch a week of real registrations, then add the rest.